Meat Chickens 101 - Part 2
Fresh From the Farm
August 29, 2025
Meat Chickens 101-Part 2
All of the set-up is done, now we wait on the cute little chicks to arrive. I often order 50 meat chicks and 50 laying chicks. One of my favorite things is to hold a meat bird in one hand and a normal chick in the other. You can’t tell much of a difference on the first day, but after a week, your hand can feel the difference, then after two weeks, your eyes can easily pick out the meat birds. You can keep them together, but it is easier to just set the meat chicks up in their own space. They truly are much, much messier.
My birds will spend their first couple of weeks in an indoor brooder where they will be free from drafts and have a heat lamp to keep them warm at all times. This can be a sectioned off part of the garage, feed room or part of the normal coop. Just be sure that they have their own space that is warm and cozy. Chicks need to have the temperature at 95F for the first week, 90F for the second and 5 degrees less each week until they don’t need the light any more. You lower the temperature by raising the light.
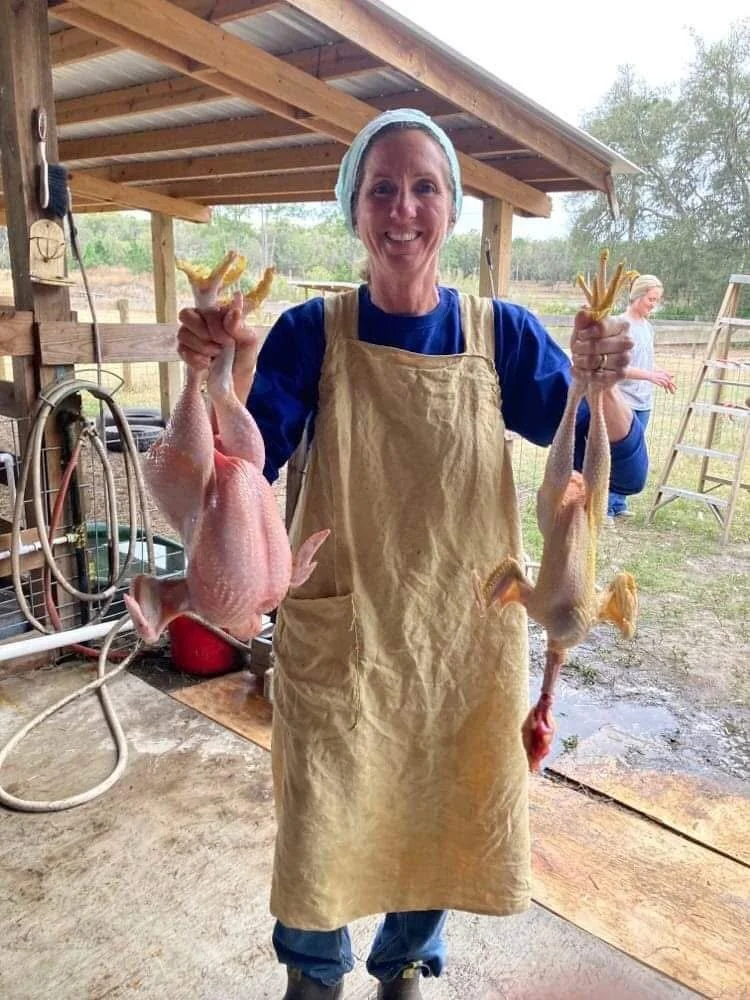
This is the reason we raise Cornish Rock X for meat. Here you see an 8 week old meat bird on the left and a 6 month old yard bird on the right... a real life rubber chicken.
Like I said, these chicks are way messier than your normal standard breeds. They will generate as much poo in three days as a normal batch of chicks will in a week. So, I like to move them out to the tractor as soon as it makes sense. I stretch an extension cord out there and use an Ohio brooder to keep them warm. An Ohio brooder is a box raised off the ground a few inches with a light in the top. The box holds the heat in and the chicks can come and go under the edges as they want. This allows them to be outdoors while still enjoying the heat and coziness of an enclosed area. I keep the brooder and light available until they are feathered enough to stay warm at night.
The tractor will be moved every few days at the beginning, daily for a few weeks and then twice a day at the end. When they are little, I will drag it forward just enough that they are off of the poopy ground. Then as they grow, I move it when they have stomped down and eaten most of the vegetation. It’s better for the ground to move it more often, so go ahead and do it if you think it needs it.
It's funny how much chickens love grass and all of the critters that live just under the surface. While this breed doesn’t scratch nearly as much as other breeds, they still like a live bug and will go after it fast. Chickens are voracious omnivores and they LOVE to chase down anything that moves and gobble it up. Bugs, snakes, lizards, even mice! You can even throw little crickets and grubs to them. Then watch the game as one chick tries to keep its treasure from all of the others. Farm life entertainment at its best!
While I cannot ensure that there are a ton of live critters waiting for my chicks, I can plant a chicken salad ahead of them. Kale, broccoli, turnips and clovers all make great “food plot” material for our meat birds, as well as the deer. I don’t always get it done, but I am hoping to this year. I plan on scattering some seeds over top of the grass and wait on the afternoon rain to water them in. With this heat they should germinate in just a few days and be ready for the chicks in a few weeks. If I do a couple of plantings spaced out a few weeks then they should have fresh greens daily right up until harvest time.
Once the birds are in the tractor and on the pasture, the only thing to do is feed them twice a day, move them and keep an eye on the water. They need normal chick care at the beginning, but they grow so fast that they quickly don’t need much at all. There are a few weeks when all you do is the quick morning feeding and dragging the tractor forward. Then feed again in the evening. Always feed twice a day.
This is the time where you will focus on getting everything together for Chicken Killin’ Day. There are few things that are specific to the harvesting, but many of the items are normal household things. And it can certainly be done using only what you have, but some of the items make the job easier. Here is the full list: sharp knives, killing cone, scalding pot, thermometer, hay string, plucker, cutting boards, more sharp knives, bone shears, stainless bowls, buckets, baggies, ice-filled coolers and two or three friends that want to help and learn.
We like to set everything up in stations with at least one person that is in charge of each. The killing station, or neck cutting station as it is often called, is just a safety cone with the narrow opening cut to accommodate the size of meat birds and then screwed to the fence. This station needs a nice sharp knife and a person that doesn’t mind getting splattered with a little blood. For years it was my beautiful and talented, medical school niece that took on this unappealing job for us. She was always careful to not cut off the heads as it is easier if they stay attached to the bird for the scalding and plucking.
The bird hangs for a few minutes and bleeds out into a bucket lined with a little bit of peanut or alfalfa hay. This blood/hay mixture will get dumped at the base of a banana tree later. Banana trees love high nitrogen and dead things. Once the birds are bled out and fully dead, they get a hay string attached to their leg and they head to the scalding pot.
The scalding pot needs to be the biggest pot you can find. The bigger, the better. The more water you have, the steadier the temperature will stay with all of the dunking and losing heat through steam. We normally shoot for 147F. The chicken gets a few dunks adding up to about 30 seconds worth, then test the scald by trying to pluck a tail feather. If the feather comes out easily, it’s ready for the plucker.

The plucking can be done in a store-bought or homemade plucker, or done by hand. Electric pluckers make this a much faster and somewhat cleaner job. If everything is just right, all of the feathers come off with less than a minute tumbling around in the plucker. If all of the feathers don’t come off, then it wasn’t scalded enough or the water wasn’t hot enough. If the skin tears in the plucker, then your water was too hot or it was left in the plucker too long. If most of the feathers come off and you end up with a nice-looking bird, it was all just right.

The plucked chicken is taken to the wash station where it will be eviscerated, cleaned up, and then put in a cooler. First, we remove the heads and feet and toss them in the appropriate bucket. Then the chicken is laid on its back, the body cavity opened and all of the insides carefully removed. We save the heart, liver, and gizzard and place those all in the designated bowls. The Lungs are scraped out and then the trachea and esophagus are pulled out. The bird is rinsed well and now resembles something you would buy at the grocery store.
Coolers filled nearly to the brim with ice and a little water are soon filled with chilling chickens. This part is really important. Many people try to cook a yard bird and they have a couple of things against them. The first one is that a yard bird and meat bird are so very different. The second is that they don’t let the chicken rest after they go through rigor mortis, and they end up with very tough chicken. A 24-hour ice bath really helps in the tenderness of the bird.
All the birds are killed and chilling in the coolers. Now it’s time for the clean-up and a break until the next day when the processing continues in the kitchen. Oh, and fried chicken gizzards and hearts! This is one of my favorite treats and by-products of raising meat birds. And then there’s the chicken stock made from the carcasses. YUM!!! But that is a whole other thing that I will tell you about next week. Until then, grow something good to eat. And most importantly, be kind!